
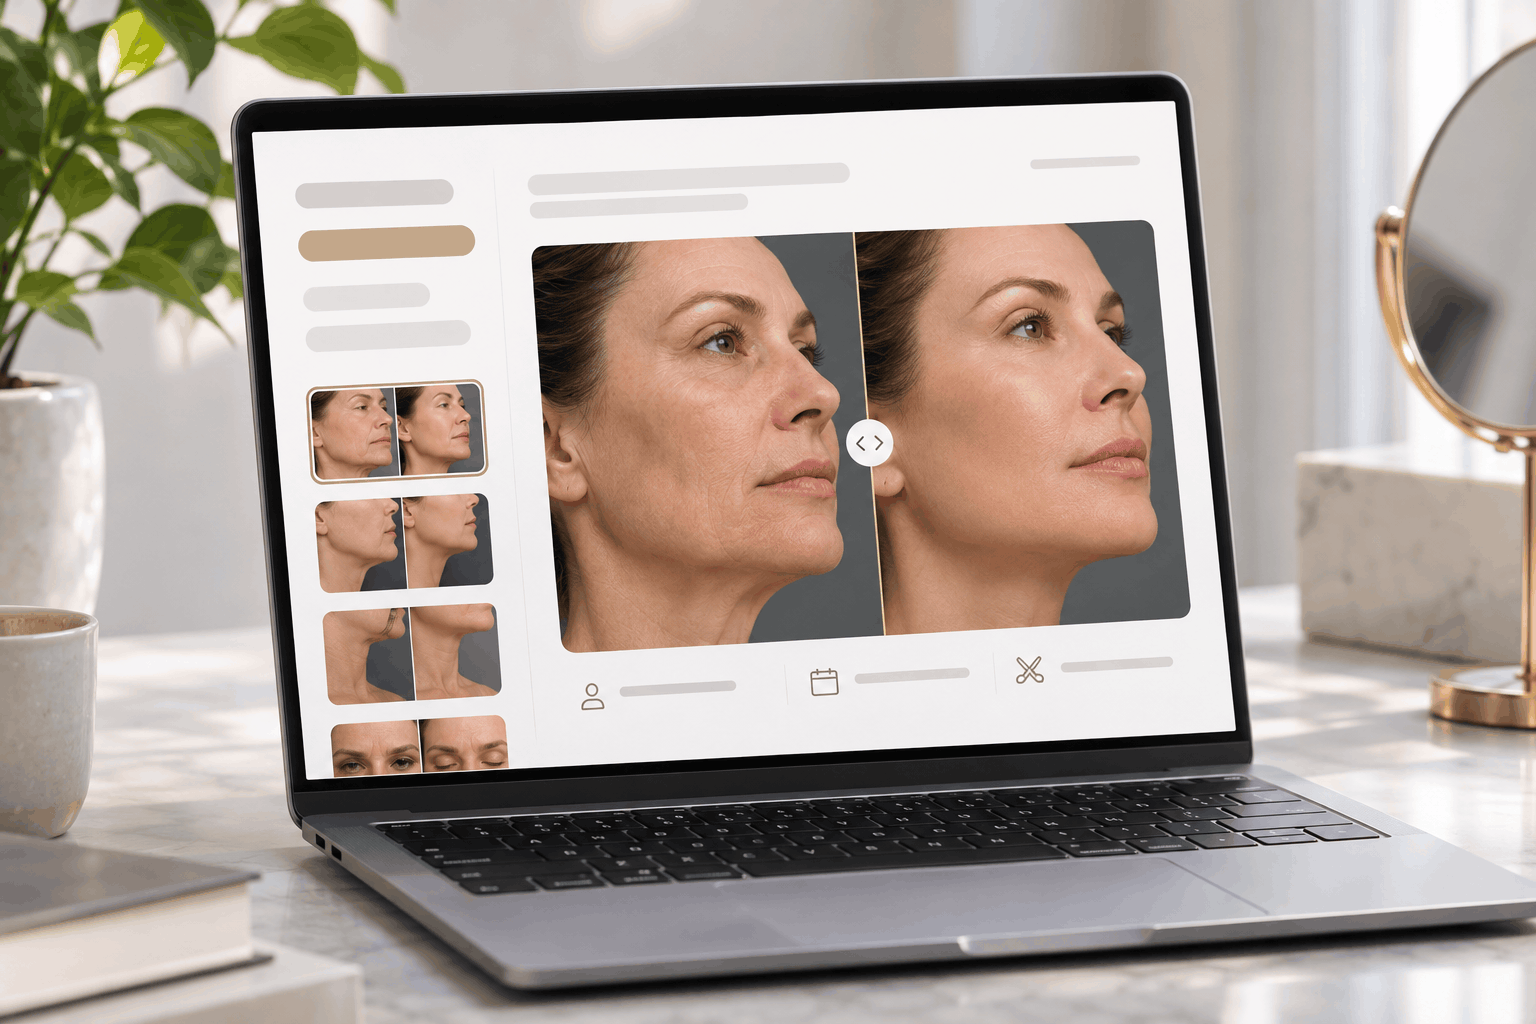
On most plastic surgery websites, the before-and-after gallery is one of the most visited sections and one of the most persuasive. Prospective patients scroll for a long time looking for someone who resembles them, judging the surgeon’s aesthetic, and deciding whether to book. Yet many galleries are slow, disorganized, thin on context, and missing a clear next step. Thoughtful before-and-after gallery optimization turns this high-traffic section into a dependable source of qualified consultations.
This guide covers how to structure the gallery, set photography standards, add useful case details, handle technical SEO, stay compliant, and convert views into bookings.
Why the Gallery Deserves Strategic Attention
Patients rarely book a cosmetic procedure based on copy alone. They want visual proof that the surgeon can deliver results they would be happy with. The gallery is where that proof lives, which is why prospects who browse it deeply are often among the most motivated visitors on the site.
Treating the gallery as a photo dump wastes that intent. A gallery built around how patients search, compare, and decide shortens the path from browsing to booking. It also supports search visibility, since many patients search specifically for before-and-after results for a procedure in their city.
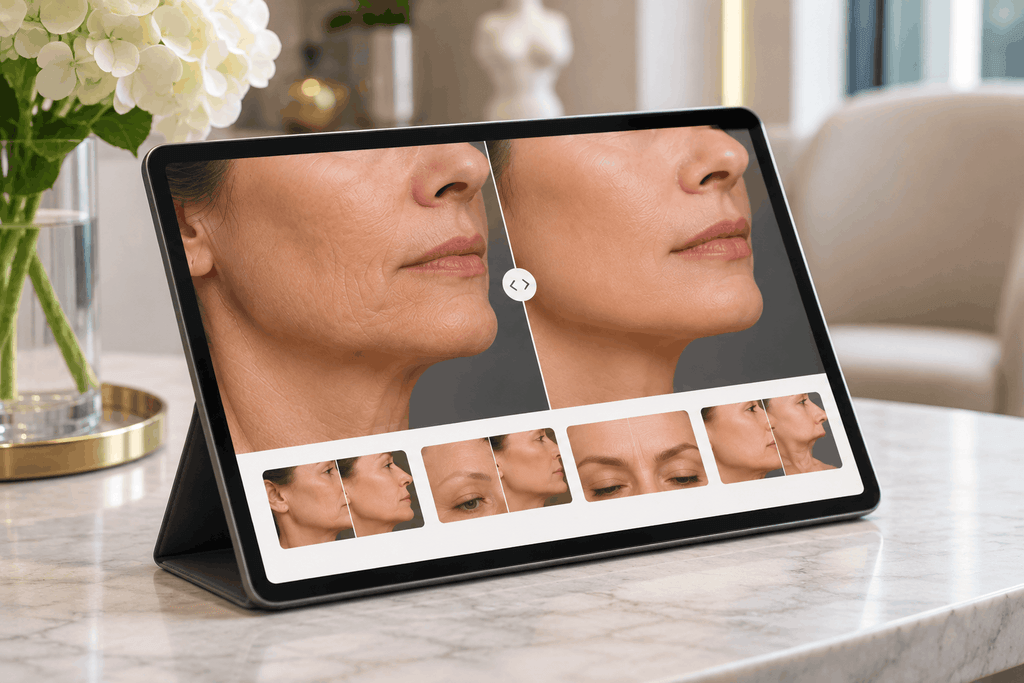
Organize the Gallery Around How Patients Browse
Patients arrive with a specific procedure in mind and a specific question: will this work for someone like me? The structure should help them answer it quickly.
Group by Procedure and Body Area
Start with clear top-level categories, such as face, breast, and body, then break each into individual procedures. A patient interested in rhinoplasty should reach rhinoplasty cases in one or two clicks, not scroll through every case on the site. Add a direct link to the gallery in the main navigation, since many visitors look for it immediately.
Add Filters That Matter to Patients
Filters help patients find their “twin.” Useful options include age range, skin tone, body type, and procedure-specific details such as implant type or technique. Even simple filters dramatically improve the browsing experience in large galleries. Make sure filters work smoothly on mobile, where most gallery browsing happens, and that filtered views load quickly without reloading the whole page. Representation matters too: a gallery that shows a range of ages, ethnicities, and body types tells more prospects that the surgeon has experience with patients like them.
Link Galleries and Procedure Pages Both Ways
Every procedure page should feature a few strong cases and link to that procedure’s full gallery. Every gallery category should link back to the procedure page for details on candidacy, recovery, and pricing. This two-way connection keeps visitors moving toward a consultation instead of hitting a dead end.
Set Photography Standards
Inconsistent photos undermine trust, even when the results are excellent. Patients notice when the after photo has better lighting, a different angle, or more flattering posture.
Use the same background, lighting, camera distance, and lens settings for before and after shots. Standardize poses for each procedure, including front, oblique, and profile views where relevant. Ask patients to remove makeup and jewelry for facial photos and to wear consistent garments for body photos. Record the time since surgery for each after photo. Consistency makes results easier to evaluate and signals professionalism. Create a written photo protocol so every staff member who takes photos follows the same steps.
Write Case Details That Answer Questions
A photo pair with no context leaves patients guessing. A short case description makes each result more useful and more persuasive.
Include the patient’s age range, the procedure or combination of procedures, relevant technique details, and how long after surgery the after photo was taken. Where the patient has consented, briefly describe their goals, such as “wanted a more defined jawline without looking operated on.” Write these details as original text for each case. That unique content also gives search engines something to understand beyond the images. If your team lacks time to write them, content writing support can build a consistent template and keep descriptions moving as new cases are added.
Technical Elements of Before-and-After Gallery Optimization
A gallery can be beautifully organized and still underperform if it loads slowly or is hard for search engines to interpret. Technical before-and-after gallery optimization focuses on speed, structure, and how images are handled.
Decide on Case Page Structure
Many galleries benefit from giving each case its own URL with its own photos and description. Individual case pages can be shared directly, linked from procedure pages, and understood by search engines. If cases have no unique text, though, hundreds of near-identical pages can become thin content. Either add meaningful details to each case or keep cases grouped on category pages.
Optimize Image Files
Use descriptive, respectful file names and alt text, such as “Rhinoplasty before and after, female patient, profile view.” Avoid stuffing keywords into alt text. Compress images, serve modern formats, set explicit dimensions, and lazy-load images below the first screen so pages stay fast on mobile. These details fall under onsite SEO and are often overlooked in gallery plugins.
Host the Gallery on Your Own Domain
Some third-party gallery tools load images from another domain or inside an embedded frame. That setup can limit how much search value your own site receives from the content. Where possible, keep gallery content on your domain and confirm that search engines can crawl and render it.
Handle Sensitive Images Carefully
Breast and body galleries often include nudity. Google’s SafeSearch guidance recommends grouping explicit images on separate URLs so filtering does not affect the rest of the site. A click-to-view overlay or blur also improves the experience for visitors browsing in public or at work, without hiding results from those who want to see them.
Turn Gallery Views Into Consultations
A gallery that informs but does not convert leaves value on the table.
Put a CTA on Every Case
Add a clear call to action near each case, such as “Book a consultation” or “Ask about this procedure.” A sticky contact bar on mobile keeps the next step visible while patients scroll through dozens of photos. Good website design makes these CTAs feel helpful rather than pushy.
Suggest Similar Cases
At the end of each case, show related cases from the same procedure and similar patient profiles. This keeps engaged visitors on the site and helps them build confidence before reaching out.
Be Careful With Gating
Some practices hide the gallery behind an email form. This can capture leads, but it often frustrates visitors and pushes them to competitors with open galleries. A better balance is to keep the gallery open and offer optional extras, such as saving favorite cases or receiving more examples by email.
Extend the Gallery Into Follow-Up
The gallery should not stop working once a prospect submits a form. Patient coordinators can send a short selection of cases that match the prospect’s procedure and profile after the first call, or include them in a pre-consultation email. Seeing relevant results again just before the visit reinforces confidence and gives the prospect specific examples to discuss with the surgeon, which makes the consultation more productive for both sides.
Stay Compliant and Ethical
Before-and-after photos are patient health information, and advertising them carries legal and ethical obligations.
Obtain documented written authorization from every patient before publishing photos, and explain exactly where they will appear. Remove or crop identifying features such as tattoos, birthmarks, and jewelry unless the patient agrees otherwise. Do not retouch or alter results, and use consistent photography so comparisons are honest. Show representative outcomes, not only the most dramatic cases. State medical board advertising rules and professional ethics codes can be strict here, so review your gallery policy with a compliance advisor.
Also note that major ad platforms restrict before-and-after imagery for cosmetic procedures. If you plan to share gallery content through social media management, confirm each platform’s current health and appearance policies first.
Keep the Gallery Fresh
A gallery with recent cases signals an active, current practice. Add new cases on a regular schedule, highlight newer techniques, and retire older photos that no longer meet your photography standards. Review the gallery quarterly to make sure every major procedure has enough cases to help patients compare.
Measure What the Gallery Contributes
Most practices know their gallery gets traffic but not whether it produces patients. Set up analytics events for gallery CTA clicks, filter use, and case views, then compare consultation rates for visitors who viewed the gallery against those who did not. Watch which procedures and cases attract the most engagement, since those insights can guide future content and campaigns. Reviewing these numbers each quarter keeps before-and-after gallery optimization grounded in booked consultations rather than assumptions about what patients want to see.

Before-and-After Gallery Optimization Questions Answered
How many photos should a plastic surgery gallery include?
There is no fixed number, but each major procedure should have enough cases to show variety in age, body type, and skin tone. A handful of strong, consistent cases per procedure is better than dozens of low-quality photos. Add new cases regularly so the gallery stays current.
Should each before-and-after case have its own page?
Individual case pages work well when each case includes unique details, such as age range, procedure, technique, and time since surgery. They can be linked and shared easily. If cases have no unique text, grouping them on procedure category pages avoids creating many thin, near-duplicate pages.
How do I keep nude gallery images from hurting my site in search?
Group explicit images on separate URLs, as Google’s SafeSearch guidance recommends, so filtering does not affect your other pages. A click-to-view overlay also helps visitors browsing in public settings. Keep the rest of your site, including procedure pages, free of explicit imagery.
Do before-and-after photos need patient consent?
Yes. Practices should obtain documented written authorization before publishing any patient photo, and practices that are HIPAA covered entities must meet those requirements for protected health information. Explain where photos will appear, remove identifying features where possible, and review state advertising rules with a compliance advisor.
What metrics show whether gallery improvements are working?
Track gallery engagement, such as cases viewed per session and time on gallery pages, alongside consultation requests from visitors who viewed the gallery. Set up analytics events for gallery CTAs. Successful before-and-after gallery optimization shows up as more consultation requests from gallery visitors, not just more page views.
Making Your Results Work Harder
Your gallery already holds the proof patients want. Organize it around how they browse, photograph every case consistently, add real context, keep it fast and compliant, and give every visitor an easy next step. LeadOrigin is an award-winning agency that helps aesthetic practices turn high-intent website sections into consistent consultation growth. Talk to our team about optimizing your gallery.